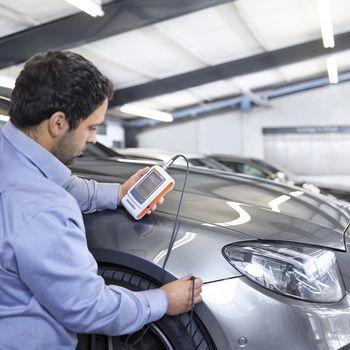
For a variety of reasons, assessing the quality of paint coatings on car bodies is increasing in importance. Narrow tolerance limits and strong demand for smooth finishes require precise measurements of the coating thickness according to clearly defined testing procedures. In addition, the measurement results should provide clues for potential process optimizations. Therefore, consistent inspection procedures – regardless of who is doing the measuring – are also essential.
Paint finishes on car bodies must fulfill a range of criteria: Not only should they provide sufficient corrosion protection (therefore requiring at least a minimum thickness) while simultaneously containing costs (minimum material waste), the color and texture must also be even and homogeneous. To check all these criteria systematically, test measurements should always be taken at the same spots, in the same way, regardless of who is currently executing the inspection.
Using simplified surface development drawings, precise inspection specifications can be displayed for the examiner, showing exactly where the paint coating is to be measured. However, such sequences are often very complex and therefore susceptible to operator failure.
The FISCHER DataCenter IP (Inspection Plan) software makes it possible to create process-controlled inspection plans that can be loaded onto handheld DUALSCOPE® FMP100 measuring instruments. Enhanced by images and text, the inspection plan clearly guides the user step-by-step through the measurement tasks like a navigation system. The readings can then be down-loaded directly to the PC for easy evaluation, archival and printing (with customisable templates). For this purpose a wide variety of analysis and statistic functions, as well as supporting graphical displays, are available.
The Fischer DataCenter IP software and DUALSCOPE® FMP100 handheld instruments put powerful tools of strategic quality control directly into inspectors’ hands: Structured measurement recording and extensive evaluation options help to highlight potential improvements in production processes, while step-by-step guidance through the complete measurement cycle not only minimizes errors and increases consistency but also makes these instruments suitable for use even by non-technical staff. For more information please contact your local FISCHER representative.